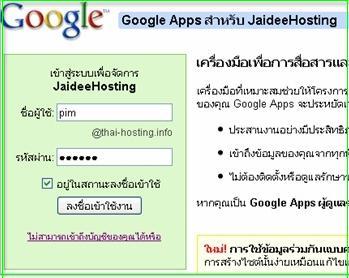
⇔Login เพื่อใช้งานการจัดการ Google apps ดังนี้คะ
เข้าที่ URL: https://www.google.com/a/cpanel/yourdomain.com/
(ตัวอย่าง https://www.google.com/a/cpanel/thai-hosting.info/ )
Login: user@yourdomain.com
Password: xxxxxxxx
ดังนี้คะ
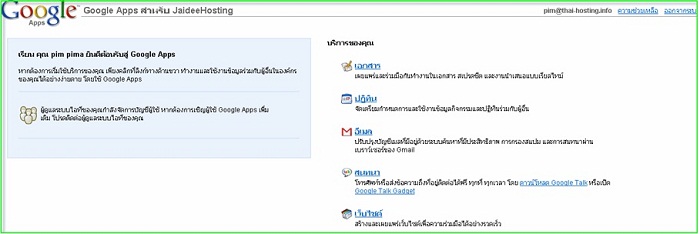
⇔เข้าสู่หน้าการใช้งานอีเมล์ของ User ดังนี้
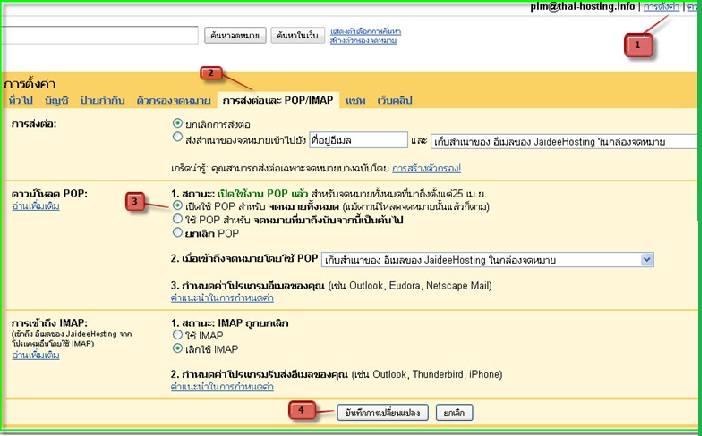
⇔การตั้งค่า ที่ Mail box Google apps
หน้าการตั้งค่า
1. ไปที่ การตั้งค่า
2. เลือกที่ เมนู การส่งต่อและ POP/IMAP
3. ที่ ดาวน์โหลด POP เลือก เปิดใช้ POP สำหรับ จดหมายทั้งหมด (แม้ดาวน์โหลดจดหมายนั้นแล้วก็ตาม)
4. คลิก Save Changes เพื่อบันทึกค่าที่เปลี่ยนแปลง
⇔หลังจากกำหนดค่าเรียบร้อยแล้ว ปิด Browserไปก็ได้ หลังจากนั้นก็ทำกระบวนการด้านล่างต่อได้เลย
ตั้งค่าการใช้งานที่โปแกรม Outlook
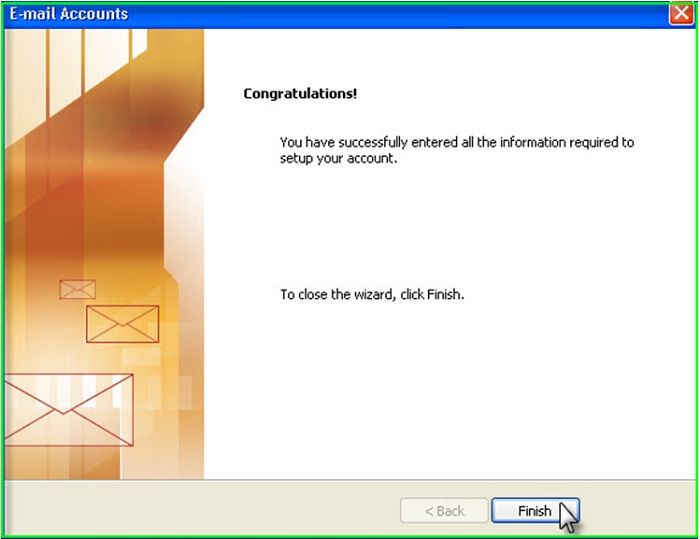
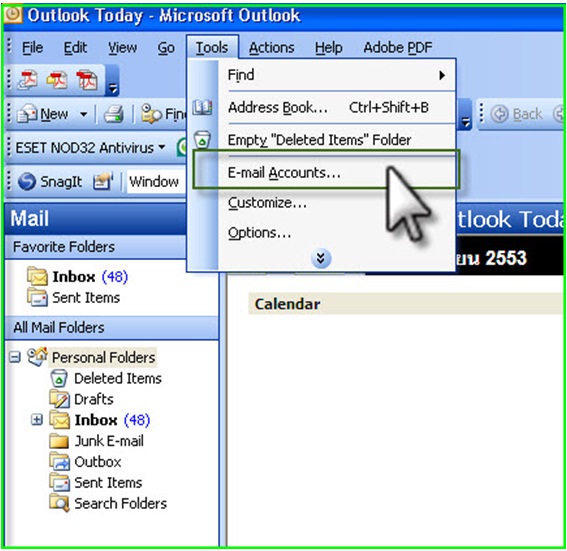
1. หลังจากเปิดโปรแกรม Outlook ให้ไปที่ Tools > E-mail Accounts
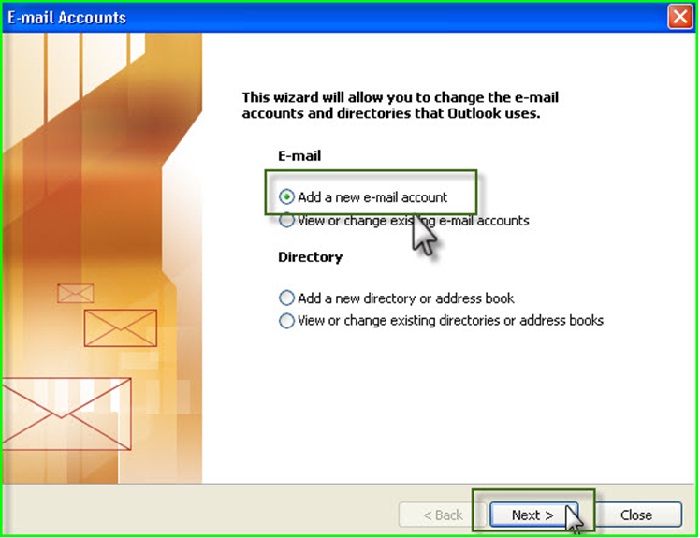
2. เลือก Add a new e-mail account แล้วกดปุ่ม Next
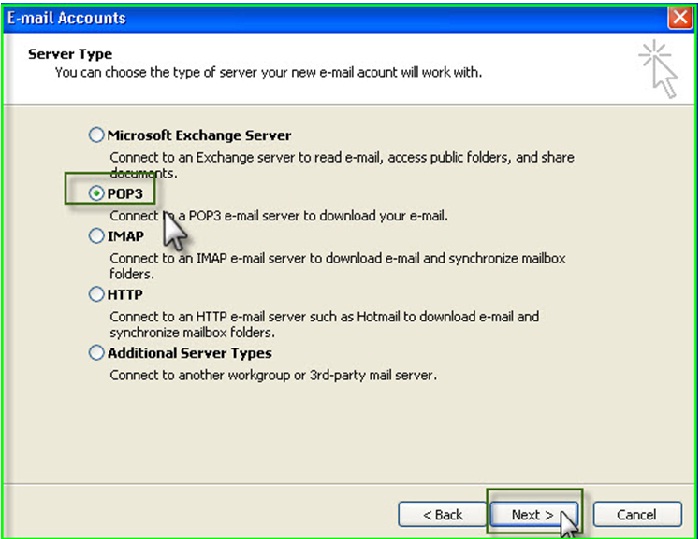
3. เลือกที่ pop 3 > คลิก > next
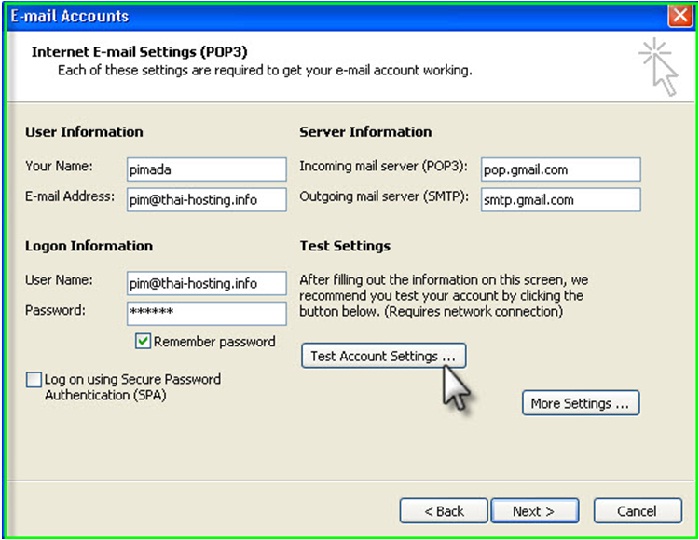
4. กรอก Username และ password
ตั้งค่าดังนี้
User Information
Your name: ชื่อที่ต้องการแสดง
E-mail Address: อีเมล์ที่ใช้งาน
Server Information
Incoming Server: pop.gmail.com
Outgoing server: smtp.gmail.com
Logon Information
user name: e-mail@yourdomain.com ตัวอย่างเช่น: pim@thai-hosting.info
password: xxxxxx
เสร็จแล้วคลิกปุ่ม Next
4. การ set ค่าเพิ่มเติม > คลิกที่ More Setting ดังนี้
- ที่ Tab General > ให้ set เป็นชื่อ account ที่ใช้งาน
ตัวอย่างเช่น pim@thai-hosting.info
.jpg)
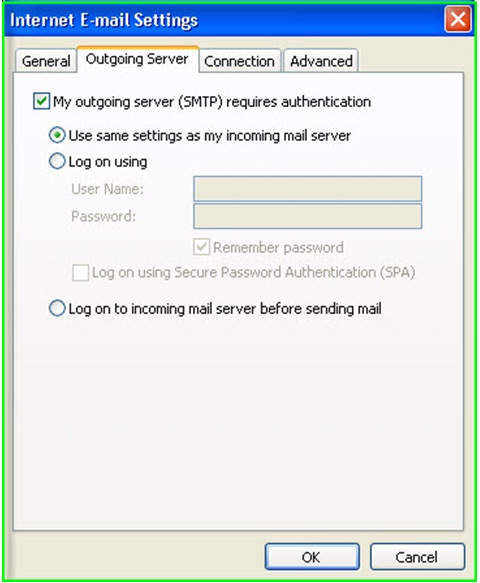
- ที่ Tab 0utgoing Server > ให้ ติ๊ก MY outgoing server requires authentication: ถูก
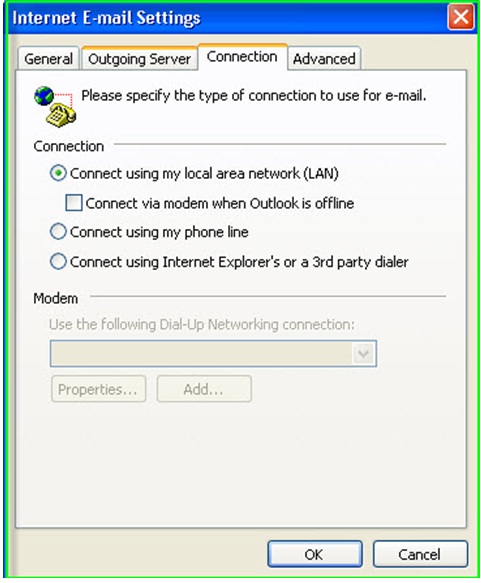
- ที่ Tab Connection > ให้ ติ๊ก Connect using my local area network(LAN)
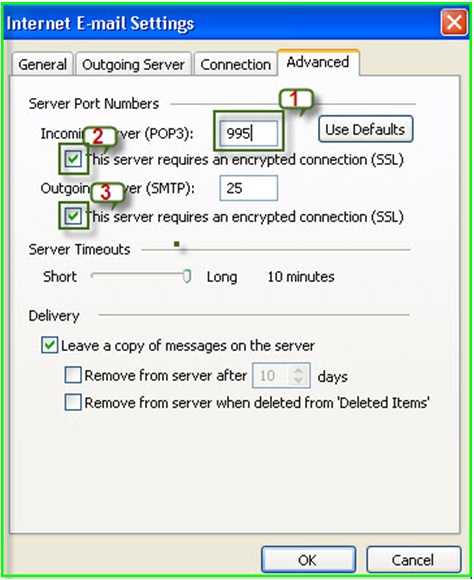
- ที่ Tab Advanced > ให้ set ค่าดังนี้คะ
1. ที่ Incoming server (POP3) : ใส่เป็น 995 (หมายเลข1)
2.This server requires a secure connection (SSL) : ถูก (หมายเลข2)
3. ที่ Outgoing server (SMTP) :ใส่เป็น 25
4.This server requires an encrypted connection (SSL) : ถูก
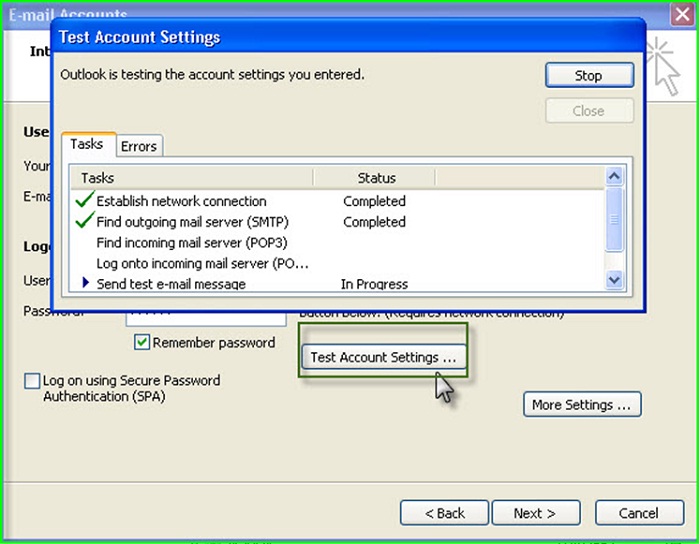
5.ตรวจสอบการ set ค่า
- คลิกที่ Test Account Settings
6. คลิกปุ่ม Finish